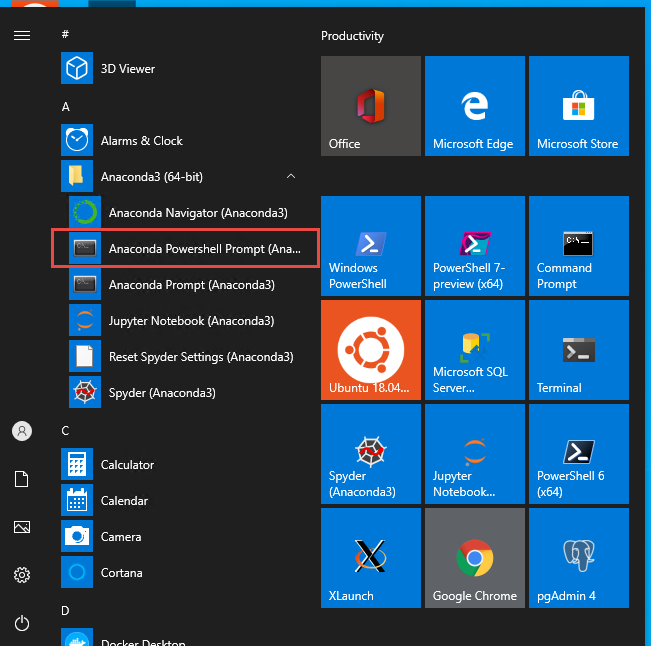
How to Access Anaconda Command Prompt in Windows 10 (64-bit)

In the world of data science, Anaconda is a widely-used, open-source distribution that simplifies package management and deployment. It is an essential tool for data scientists, providing a platform to work with Python and R languages for data processing and scientific computing. This blog post will guide you on how to access the Anaconda command prompt in Windows 10 (64-bit), a crucial step in leveraging Anaconda’s full potential.
Table of Contents
- Step 1: Install Anaconda
- Step 2: Accessing the Anaconda Command Prompt
- Step 3: Verify the Installation
- Common Errors and How to Handle Them
- Conclusion
Step 1: Install Anaconda
Before accessing the Anaconda command prompt, you need to install Anaconda on your Windows 10 (64-bit) system. Visit the Anaconda Distribution page and download the installer for Windows. Remember to choose the 64-bit graphical installer for Windows 10.
Once the installer is downloaded, double-click on it and follow the on-screen instructions. Make sure to check the box that says "Add Anaconda to my PATH environment variable" during installation. This step ensures that you can access Anaconda directly from the command prompt.
Step 2: Accessing the Anaconda Command Prompt
After successfully installing Anaconda, you can access the Anaconda command prompt in two ways:
Method 1: Through the Start Menu
- Click on the Start Menu and type “Anaconda Prompt” in the search bar.
- Click on the Anaconda Prompt app to open it. This will open a new command prompt window with Anaconda enabled.

Method 2: Through the Standard Command Prompt
- Open the standard command prompt by typing “cmd” in the Start Menu search bar and hitting Enter.
- Once the command prompt is open, activate Anaconda by typing the following command and pressing Enter:
conda activate
If Anaconda was installed correctly and added to your PATH, this command will enable Anaconda in your command prompt.
Step 3: Verify the Installation
To ensure that Anaconda is working correctly, you can run a simple command to check the installed version. Type the following command in the Anaconda command prompt and press Enter:
conda --version
This command should return the version of Anaconda installed on your system, confirming that you can now access and use Anaconda from the command prompt.
Common Errors and How to Handle Them
condais not recognized as an internal or external command- Cause: This error occurs when Anaconda is not added to the system PATH.
- Solution: During installation, make sure to check the box that says
"Add Anaconda to my PATH environment variable". If Anaconda is already installed, you may need to restart your command prompt or system for changes to take effect.
Unable to activate the conda environment
- Cause: This may happen if there’s an issue with the Anaconda installation or PATH configuration.
- Solution: Reinstall Anaconda and ensure that you select the option to add it to the PATH. If the issue persists, manually add the Anaconda installation directory to the PATH.
Version mismatch or update issues
- Cause: Outdated or incompatible versions of Anaconda.
- Solution: Regularly update Anaconda using the command:
conda update anaconda
Conclusion
Accessing the Anaconda command prompt in Windows 10 (64-bit) is a straightforward process. It opens up a world of possibilities for data scientists, allowing them to leverage the power of Anaconda’s package management and deployment capabilities. Whether you’re installing new packages, managing environments, or running scripts, the Anaconda command prompt is an essential tool in your data science toolkit.
About Saturn Cloud
Saturn Cloud is a portable AI platform that installs securely in any cloud account. Build, deploy, scale and collaborate on AI/ML workloads-no long term contracts, no vendor lock-in.
Saturn Cloud provides customizable, ready-to-use cloud environments
for collaborative data teams.
Try Saturn Cloud and join thousands of users moving to the cloud without having to switch tools.


