Deploying Bokeh Applications
Introduction
Bokeh is a powerful and versatile Python library for creating interactive data visualizations and dashboards in a web browser. With Bokeh, you can quickly and easily build a variety of visualizations, ranging from simple line charts to complex, multi-layered plots. One of the key strengths of Bokeh is its ability to create interactive visualizations that allow users to explore and interact with the data in real-time. This makes it an ideal tool for building interactive dashboards, which can provide a dynamic, responsive interface for exploring complex datasets. Another advantage of Bokeh is its ability to work seamlessly with other Python libraries and data analysis tools. This allows you to easily integrate your visualizations with your existing data analysis workflows, and to leverage the full power of Python to create rich, interactive data-driven applications.
Other key features of Bokeh include:
Customizable widgets: Bokeh provides a wide range of customizable widgets, such as sliders, drop-down menus, and text inputs, that allow users to manipulate the data and adjust the parameters of the visualization.
High-level charts: Bokeh includes a variety of high-level chart types, such as line charts, scatter plots, and bar charts, that can be easily customized and configured to suit your needs.
Low-level primitives: Bokeh also provides low-level primitives, such as glyphs and markers, that allow you to create complex, multi-layered plots with full control over the appearance and behavior of each component.
Server-based deployment: Bokeh includes a built-in server that allows you to deploy your visualizations and dashboards as web applications, with real-time updates and data streaming.
In this article, you will learn to deploy a Bokeh application/dashboard on a private server. For demonstration, I will use an EC2 instance but this can be replicated on any machine(on a private or public cloud).
Building the application
For this demo, we will deploy a simple visualization using bokeh. You can find the code required to create the visualization in this github repository.
To build and deploy the application, follow the following steps:
Inside a virtual environment, install bokeh and pandas.
pip install bokeh pandasTo deploy some projects in the above repository, you will need to download the data. So, inside the python interpreter use the following commands to download data:
    >>> import bokeh
    >>> bokeh.sampledata.download()
- Navigate to the app directory.
cd ./bokeh/examples/server/app/
- Serve the desired application locally. For the demo, you will run crossfilter.
python -m bokeh serve --show crossfilter
- After running the above command visit
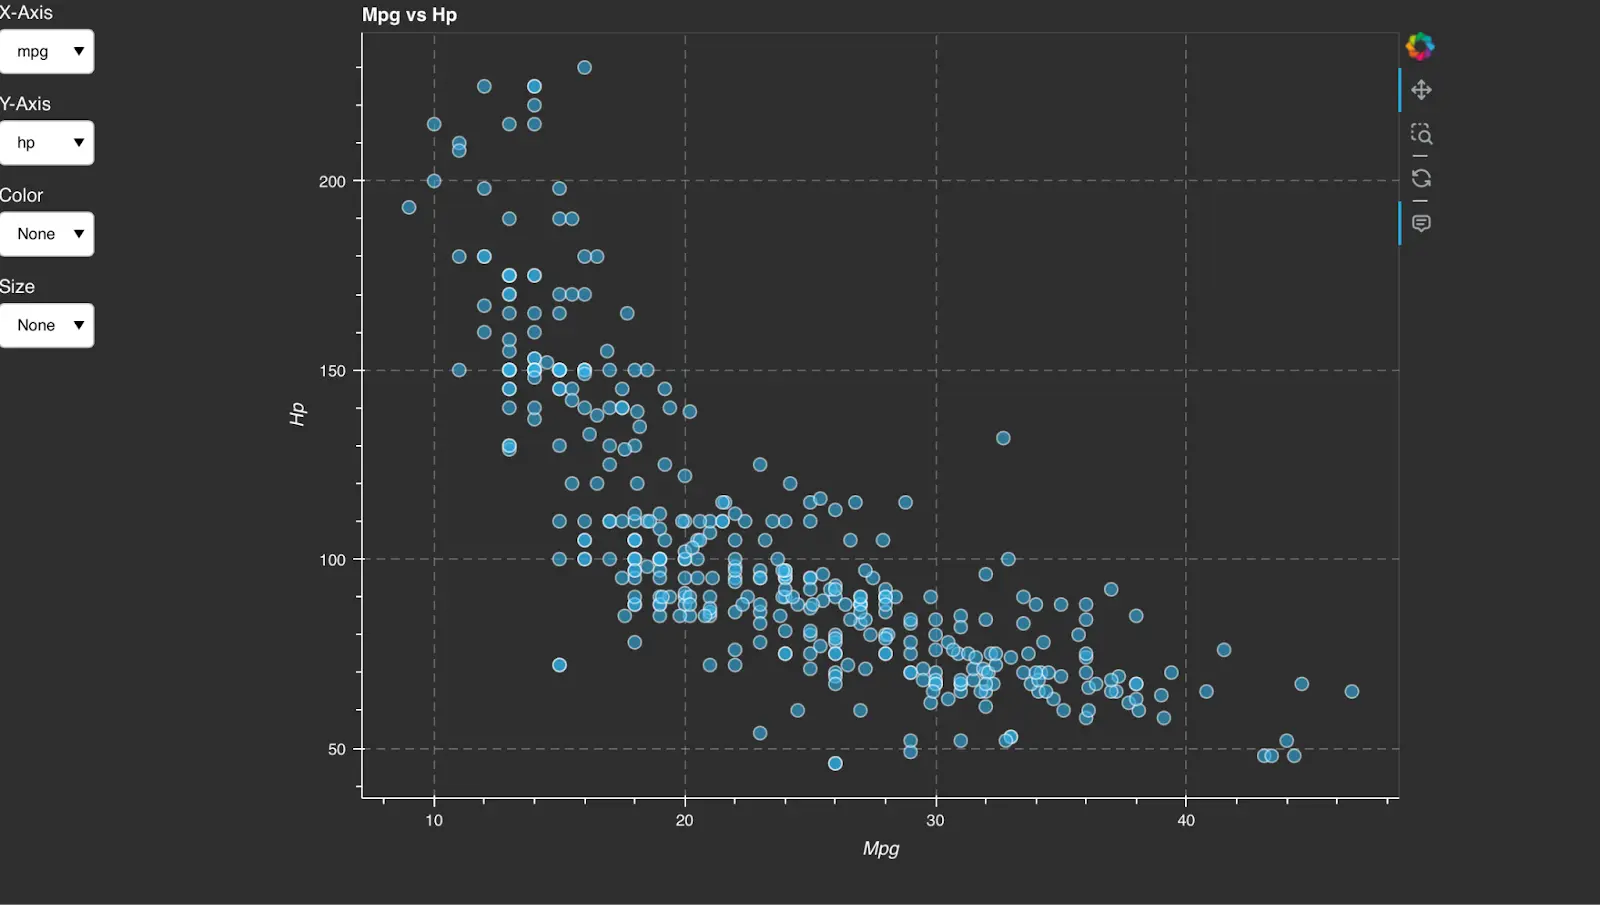
127.0.0.1:5006and you should see the visualization as shown in the image below.
Deploying Bokeh to a private server
Now that the application/server is running successfully on a local computer, we can deploy it to production. For the same, you will need to launch an ec2 instance on aws and then deploy the application on top of it.
To launch an EC2 instance, follow the following steps:
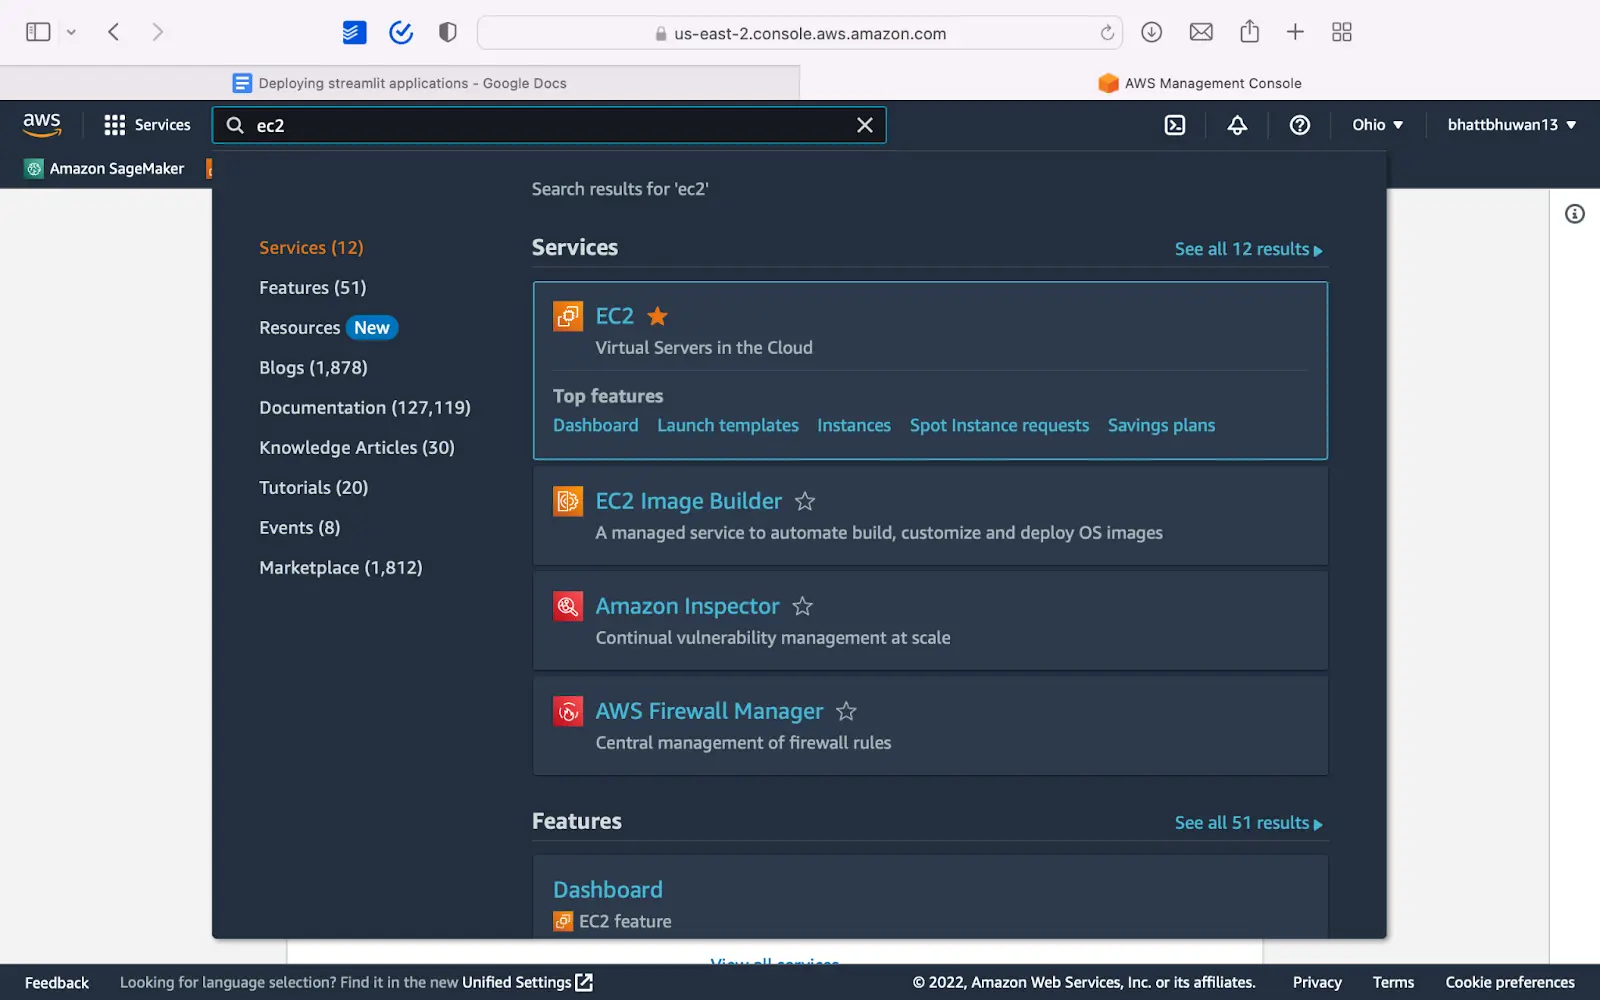
- login to aws, find EC2 among the services and click to open it.
- Click on the Launch Instance button:

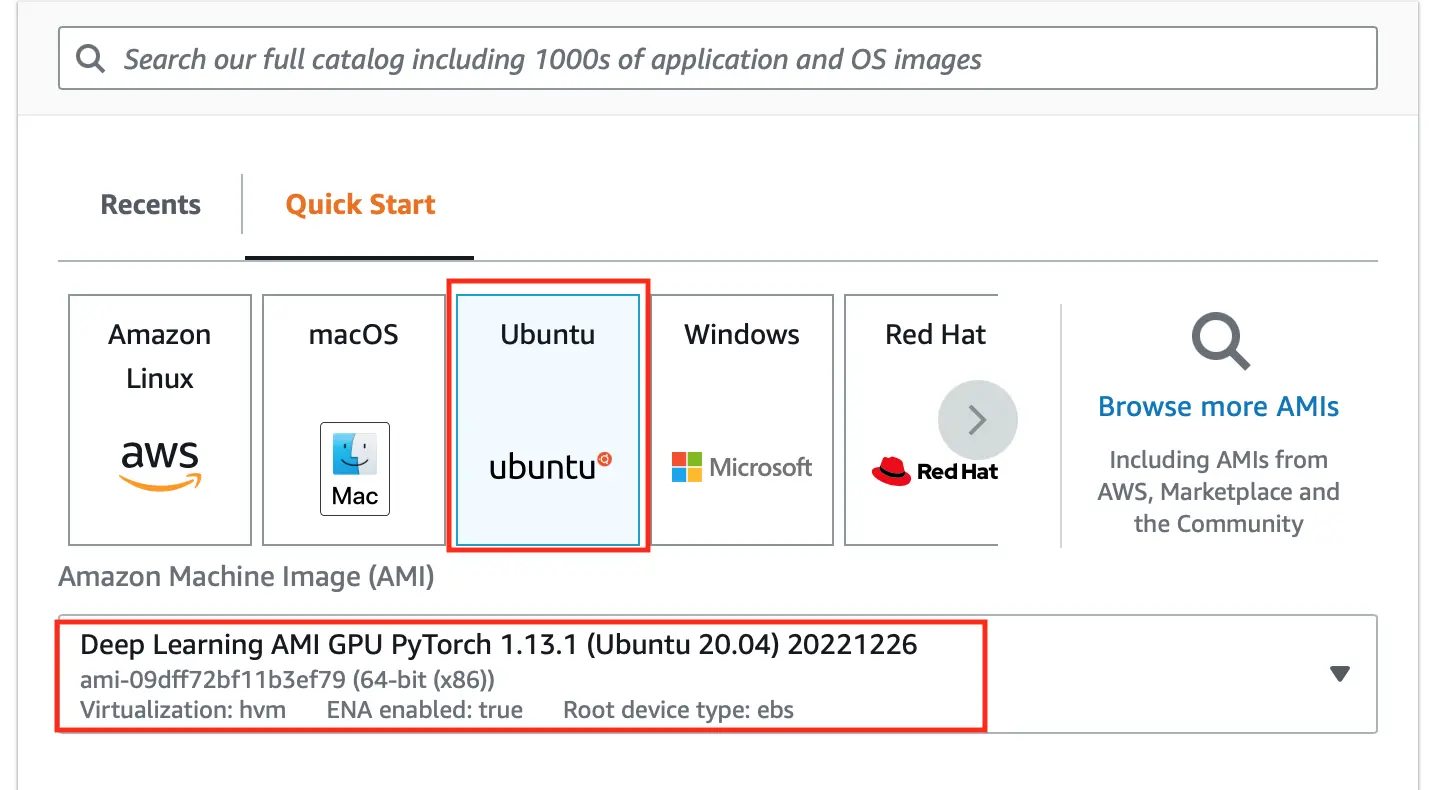
- You are free to use any instance and OS type, but for the sake of convenience, choose an Ubuntu instance and for the AMI choose deep learning ami. This comes with python, virtual environment and anaconda pre installed and saves us time and effort in later steps.
- This is important. No matter which cloud service you use, please allow connection on port 80 and 443(optional). On AWS EC2, you can do this by checking on allow HTTP and HTTPS traffic under the Network Settings. See the image below for reference.
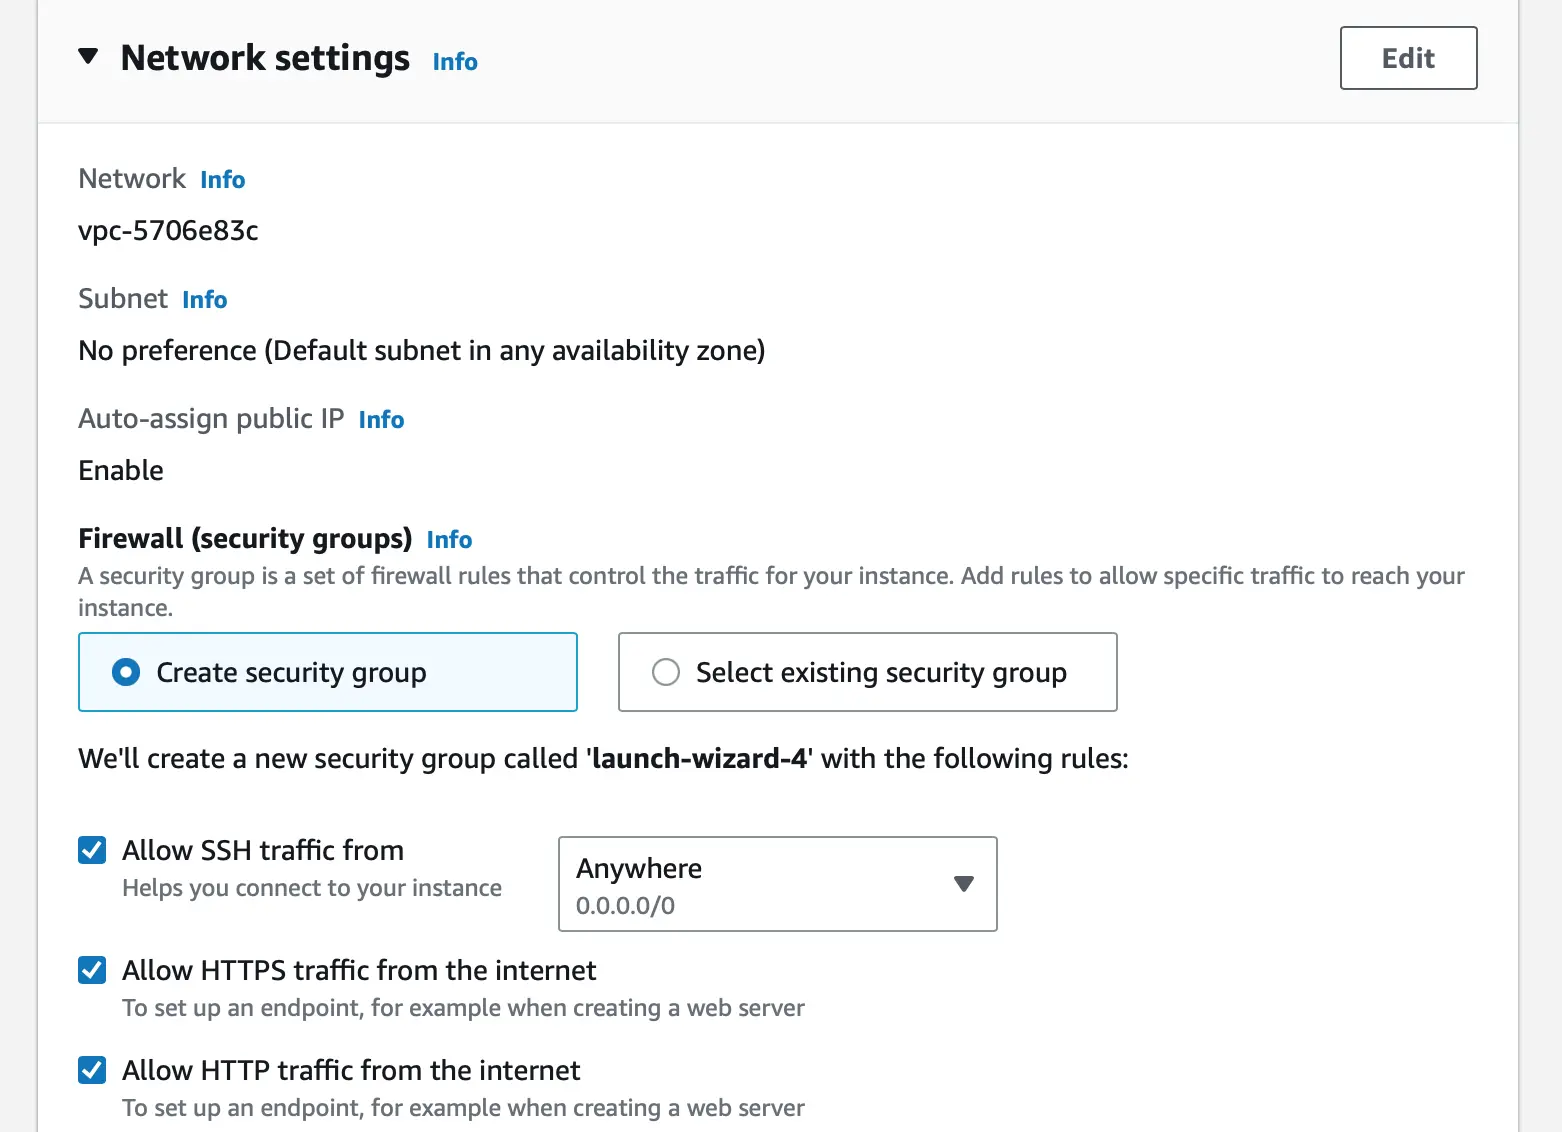
Now that you have a server ready, you can deploy the application.
To deploy the application, follow the following steps,
- Create a virtual environment and install all the dependencies in the requirements.txt file created earlier. To install the dependencies, use the following command:
pip install bokeh pandas
- Inside the python interpreter use the following commands to download data:
    >>> import bokeh
    >>> bokeh.sampledata.download()
Install nginx. In an ubuntu based instance, you can do so by using the command
sudo apt install nginxConfigure nginx by creating a new file,
bokeh_nginxin the/etc/nginx/sites-enabled/directory. The file should contain the following contents:
server {
    listen 80 default_server;
    server_name 3.20.237.191;

    location / {
        proxy_pass http://127.0.0.1:5006;
        proxy_set_header Upgrade $http_upgrade;
        proxy_set_header Connection "upgrade";
        proxy_http_version 1.1;
        proxy_set_header X-Forwarded-For $proxy_add_x_forwarded_for;
        proxy_set_header Host $host:$server_port;
        proxy_buffering off;
    }
}
In the above configuration, please replace 3.20.237.191 with the public ip of your server.
Restart nginx: sudo service nginx restart
Clone this github repository and navigate to the app directory. Use cd ./bokeh/examples/server/app/
Finally, in the directory containing crossfilter folder, with the virtual environment activated, run the bokeh server using the following command:
python -m bokeh serve --show crossfilter/ --allow-websocket-origin=3.20.237.191 &
Note: If you would like to serve other applications in the repository(example: gapminder), you can do so by just changing the name(ex: replace crossfilter with gapminder in the above command) of the application in the above command. However, you will need to install the required dependencies.
You can visit the public URL of your server to see the bokeh application in action. For this particular task, the public ip is 3.20.237.191.
Conclusion
In this article, you learned to build and deploy bokeh dashboards on a private server. The same steps (i.e develop locally, copy code to server, configure nginx, and run application/server) can be followed to deploy any Python based web application or the API.
You may also be interested in:
[The Busy Data Scientist’s Guide to Data Science Resources](https://saturncloud.io/blog/the-busy-data-scientists-guide-to-data-science-resources-2022/)
[Setting Up Your Data Science & Machine Learning Capability in Python](https://saturncloud.io/blog/setting-up-your-data-science-machine-learning-capability-in-python/)
About Saturn Cloud
Saturn Cloud is a portable AI platform that installs securely in any cloud account. Build, deploy, scale and collaborate on AI/ML workloads-no long term contracts, no vendor lock-in.
Saturn Cloud provides customizable, ready-to-use cloud environments
for collaborative data teams.
Try Saturn Cloud and join thousands of users moving to the cloud without having to switch tools.


