Activating Conda Environment from PowerShell: A Comprehensive Guide

As a data scientist, managing your project environments is crucial for maintaining reproducibility and consistency. Anaconda, with its package manager Conda, is a popular choice for this task. This blog post will guide you through the process of activating a Conda environment from PowerShell, a powerful shell scripting language.
Why Use Conda Environments?
Conda environments allow you to isolate your project-specific dependencies, ensuring that different projects can have their own set of packages without interference. This is especially useful when working on multiple projects with varying requirements.
Why PowerShell?
PowerShell is a task automation and configuration management framework from Microsoft. It’s a powerful tool that can automate complex, repetitive, and error-prone tasks, making it a great choice for data scientists working on Windows.
Step-by-Step Guide to Activating Conda Environment from PowerShell
Step 1: Install Anaconda
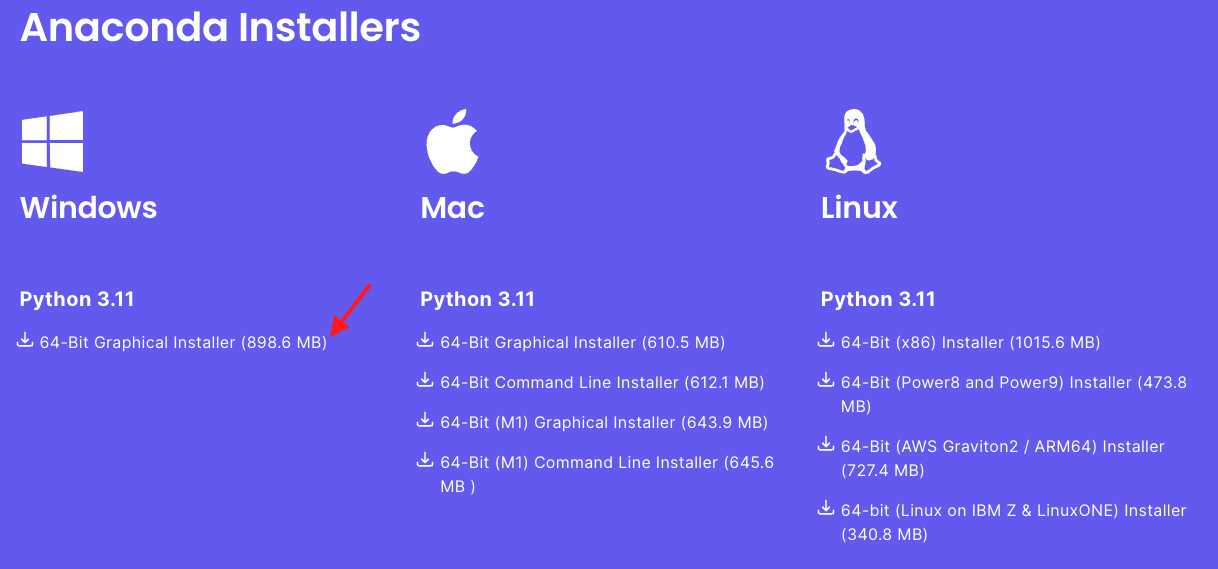
Before you can activate a Conda environment, you need to have Anaconda installed. You can download it from the Anaconda website. Choose the version that suits your operating system, in this case it will be Window.

Step 2: Open PowerShell
Once Anaconda is installed, open PowerShell. You can do this by searching for ‘PowerShell’ in the Start menu.
Step 3: Enable unrestricted Powershell script execution
set-executionpolicy unrestricted
Then makes sure that the conda Script directory in is your Path. For instance, with miniconda: %USERPROFILE%\Miniconda3\Scripts
Step 4: Initialize Conda
To use Conda from PowerShell, you need to initialize it first. This can be done by running the following command:
conda init powershell
This command will modify your PowerShell profile file, allowing you to use Conda directly from PowerShell. Then restart powershell. An initialisation script is run every time Powershell starts.
Step 5: Create a Conda Environment
If you don’t have a Conda environment yet, you can create one using the following command:
conda create --name myenv
Replace myenv with the name you want for your environment.
Step 6: Activate the Conda Environment
Finally, you can activate your Conda environment using the following command:
conda activate myenv
Again, replace myenv with the name of your environment. Once activated, you can start installing packages and running your scripts within this environment.
Troubleshooting Tips
If you encounter issues while activating your Conda environment from PowerShell, here are a few things you can try:
- Ensure that Anaconda is installed correctly and that the Conda command is available in your system PATH.
- Make sure poweshell execusion policy was restricted to current user by running the following from my poweshell
Set-ExecutionPolicy -ExecutionPolicy RemoteSigned -Scope CurrentUser - Permission Errors: On Windows, you may encounter permission errors when activating environments. Run PowerShell as an administrator to ensure the necessary permissions are granted.
Conclusion
Activating a Conda environment from PowerShell may seem a bit challenging at first, but it becomes quite straightforward when you follow the steps outlined above. Once your Conda environment is active, you can create a controlled environment for your project dependencies. This ensures that your projects maintain consistency and reproducibility, regardless of their varying complexity in terms of requirements.
About Saturn Cloud
Saturn Cloud is a portable AI platform that installs securely in any cloud account. Build, deploy, scale and collaborate on AI/ML workloads-no long term contracts, no vendor lock-in.
Saturn Cloud provides customizable, ready-to-use cloud environments
for collaborative data teams.
Try Saturn Cloud and join thousands of users moving to the cloud without having to switch tools.


